The Ultimate Guide to Creating a Diamond Painting Masterpiece
Diamond painting is a fun and relaxing hobby that combines the best of cross-stitch and paint-by-numbers. It involves placing tiny, sparkling diamonds on a canvas to create beautiful artwork. Whether you're new to diamond painting or looking to improve your skills, this guide will help you create a masterpiece.
Key Takeaways
- Choosing the right diamond painting kit is important. You need to decide between full drill and partial drill and select the right size for your project.
- Having the right tools and accessories can make your diamond painting experience more enjoyable. Essential tools include a diamond pen, tray, and wax.
- Properly displaying and preserving your finished artwork ensures it lasts a long time. Consider framing your piece and using sealants for added protection.
Choosing the Perfect Diamond Painting Kit
Choosing the right diamond painting kit is a big deal, especially if you're just starting out. The kit you pick can make or break your experience. Let's dive into what you need to know to make the best choice.
Essential Tools and Accessories
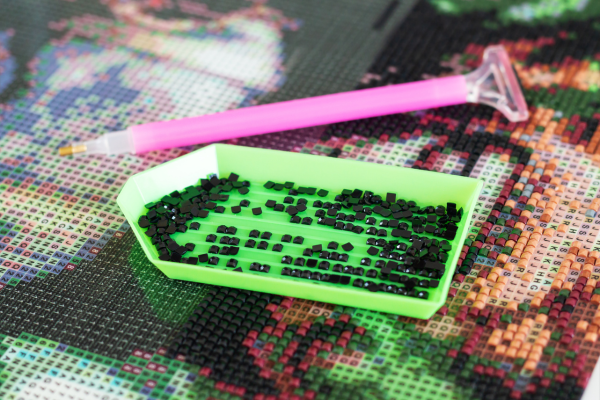
Must-Have Tools for Beginners
Alright, let's dive into the must-have tools for anyone starting their diamond painting journey. First up, the diamond art pen. This isn't just any pen; it's your magic wand for picking up those tiny gems and placing them perfectly. Trust me, it's way more fun than using tweezers. Plus, many come with a cushy grip, so your fingers won't be screaming for mercy after a long session.
Next, we have the straightening tool. This little buddy helps you line up your stones so they're all snug and orderly. Think of it as having a tiny sergeant in your kit, keeping those sparkly troops in line.
And let's not forget the LED light pad. If you're squinting and straining to see where each little gem goes, you're doing it wrong. This lit-up lifesaver will turn your squint into a satisfied smile. It shines through the canvas from behind, highlighting those symbols and making sure you're not accidentally creating a wonky wonderland.
Optional Accessories to Enhance Your Experience
Now, let's talk about some optional accessories that can take your diamond painting game to the next level. A good ruler is a game-changer. Straight lines? Check. Even spacing? Check. The sense of satisfaction when every diamond is aligned like soldiers on parade? Double-check!
Storage boxes or bags are also super handy. As you advance in diamond painting, you'll accumulate a lot of different drills. Small storage boxes or resealable bags can help you organize your diamonds by color, making it easier to find what you need for your next project.
Maintaining Your Diamond Painting Supplies
Keeping your supplies in tip-top shape is crucial for a smooth diamond painting experience. Always replace the protective film over the sticky part of the canvas when you're not working on it. This keeps the canvas clean and the adhesive strong.
Also, make sure to clean your tools regularly. A little bit of maintenance goes a long way in ensuring that your tools last and perform well. Happy crafting!
Tips and Tricks for a Stunning Diamond Painting
Organizing Your Workspace
Before you start, make sure you have a well-lit area where you can sit comfortably for a long time. Use masking tape or cardboard to keep your canvas flat. Keep all your tools within reach to make your work more efficient.
Techniques for Placing Diamonds Perfectly
- Use a Light Pad: This tool lights up your canvas from behind, making it easier to see symbols and place your diamonds accurately.
- Stay Organized: Keep your diamonds sorted by color code. You can use pill organizers or specialized storage boxes.
- Work Section by Section: Only uncover the part of the canvas you're working on to keep the adhesive fresh.
- Use Tweezers: If you make a mistake, use tweezers to pick up misplaced diamonds and put them in the right spot.
- Press Down: Use a rolling pin to press down on the canvas after each section to ensure the diamonds are secure.
Common Mistakes and How to Avoid Them
- Overloading with Adhesive: Use just a small amount of adhesive to avoid messiness. Less is more!
- Ignoring Breaks: Take regular breaks to rest your eyes and hands. This will help you stay focused and avoid fatigue.
- Skipping the Sealant: Seal your finished work to prevent diamonds from falling off over time. You can use Mod Podge or a specialized sealant.
Remember, diamond painting is meant to be a relaxing and enjoyable activity. Take your time and enjoy the process!
Displaying and Preserving Your Finished Artwork
Framing Your Diamond Painting
Once you've completed your diamond painting, it's time to show it off! One of the most popular ways to display your masterpiece is by framing it. You can use a standard picture frame or opt for a floating frame for a more modern look. If you want something unique, consider mounting your painting on a stretched canvas or foam board. This method gives a polished finish and makes your artwork stand out.
Using Sealants for Longevity
To keep your diamonds in place and protect your artwork from dust and damage, applying a sealant is crucial. Start by applying the sealer along the edges of your canvas first, then move inward towards the center in sections, ensuring even coverage as you go. Once complete, let it dry completely before moving on to any further steps. Remember, if there are any parts where diamonds did not adhere correctly, fix them before sealing.
Creative Display Ideas
Why not get creative with how you display your diamond painting? Here are some fun ideas:
- Living Room: Hang your painting above the sofa to make it a focal point.
- Bedroom: Place your artwork above the bed for a personal touch.
- Hallway: Decorate a hallway with a series of paintings for a gallery-like feel.
- Office: Brighten up your workspace with a diamond painting to boost inspiration.
- Dining Room: Enhance your dining experience by hanging a painting above the table.
- Entryway: Welcome guests with a beautiful painting near the entrance.
- Kitchen: Add a touch of art to your kitchen by hanging a small painting on an empty wall.
- Bathroom: Use waterproof sealant and hang a painting above the bathtub or sink for a relaxing ambiance.
Your diamond painting deserves to shine, so don't be afraid to get creative with your display options!
Wrapping It Up
Alright, folks, there you have it—your ultimate guide to creating a diamond painting masterpiece! Whether you're just starting out or looking to up your game, remember that the joy is in the journey. Each tiny diamond you place is a step towards a stunning piece of art that you can be proud of. So grab your kit, find a comfy spot, and let your creativity shine. Happy diamond painting!
Frequently Asked Questions
What is diamond painting?
Diamond painting is a fun and relaxing craft where you stick tiny, shiny beads (called diamonds) onto a canvas. Each diamond matches a symbol on the canvas, helping you create a sparkling picture.
How do I choose the right diamond painting kit?
When picking a diamond painting kit, consider the size of the canvas and whether you want a full drill (covering the entire canvas) or a partial drill (covering only parts of the canvas). Also, check reviews to find top brands that offer good quality kits.
What tools do I need to start diamond painting?
To start diamond painting, you need a canvas, diamonds, a diamond pen, a tray, and some wax. These usually come included in a kit. Optional tools like a light pad or extra storage containers can make the process easier and more enjoyable.